<
Polygonal Head Tutorial
By: Zynite
Okay this tutorial is created with the assumption that you know at least the basics about 3d studio max. The version used is 3.1. Oh and just incase I am not the greatest speller. So just bare with it okay. Oh and just incase you want to see the images bigger. Just click on the images and it will enlarge.
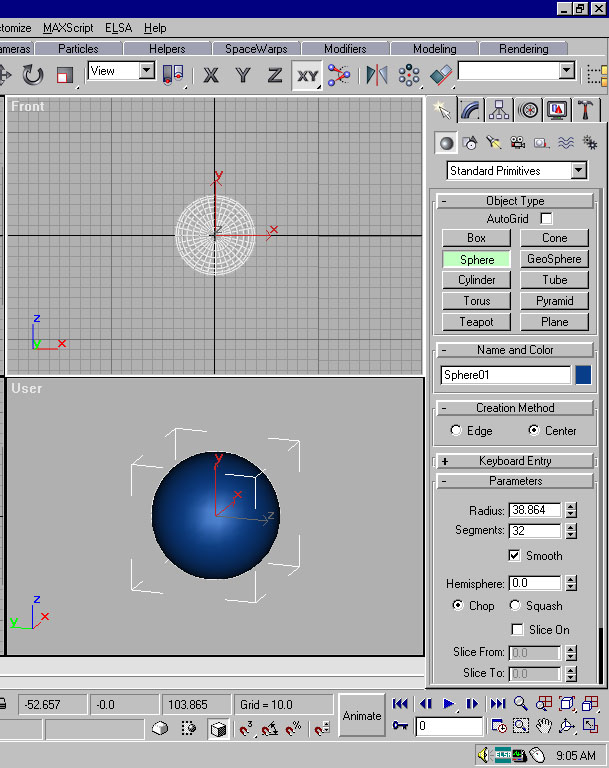
Okay first off we start with the basic shape of the head. Go to the create panel and select sphere.
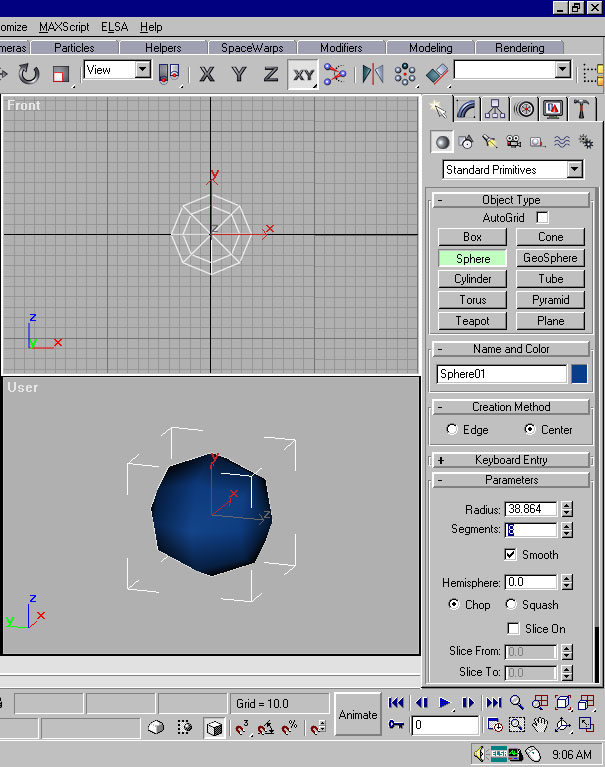
From here go to the segments panel and change the segments from 32 to 8 (some people prefer to change it to 10 instead, expierement and find out which one works for you.)
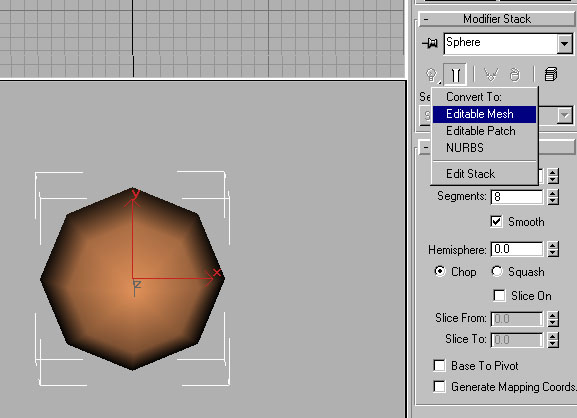
Now go and change the sphere into an editible mesh. This is the mode you will work in all the time in box modeling.
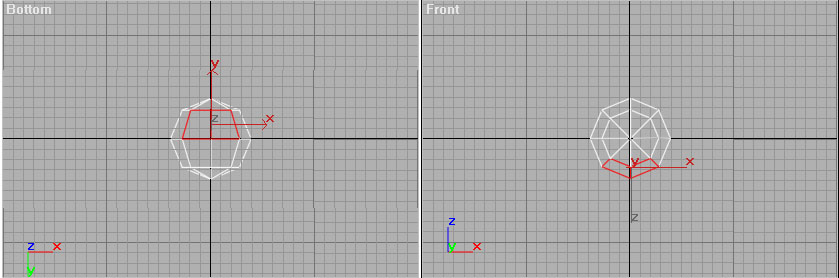
Now from here turn the top viewport.(normally the viewport in the top left) Change this to the bottom view.(just select the VP and hit "B")Now select the front 2 faces.
Now exturde the faces that you have selected. This will form the bottom half of the face.
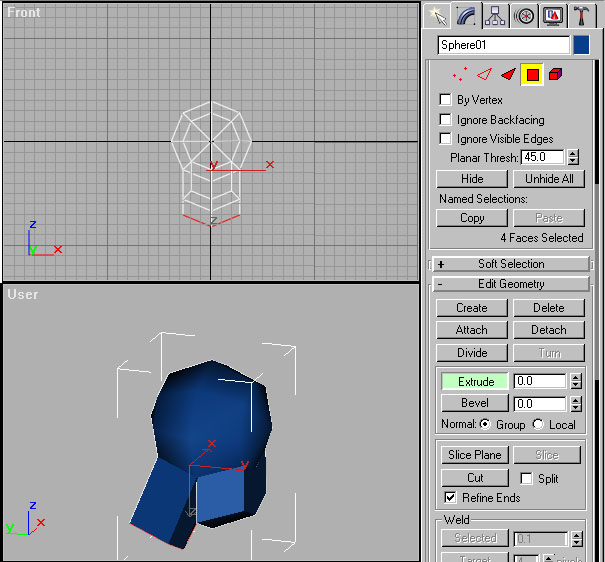
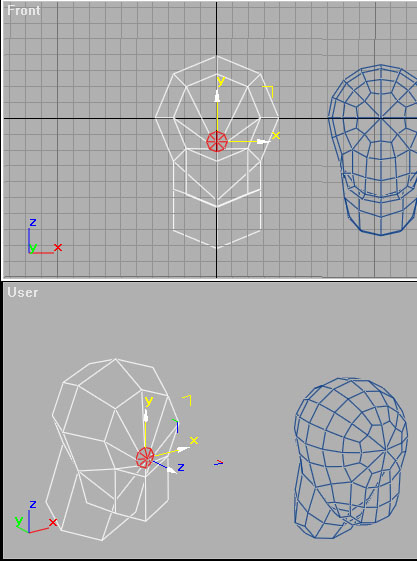
After that select the remaining 2 back faces and extrude those. After that shape the front and back to look like a profile. What you get should look something like this.
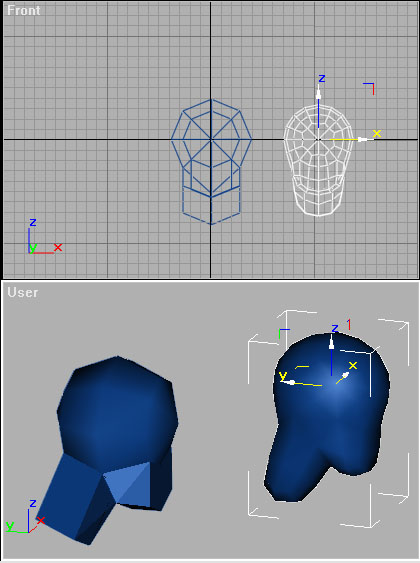
From here we are going to make a reference of our face. You do this by selecting the object and while holding the "shift" key drag the image to the side. This should copy the image and at the same time a window should appear. This window will have the opintions of copy, reference,and instance. Select reference and click okay. What you have just done is made a copy that will update when you work on the original. Now go to the copy and meshsmooth it. The meshsmooth is located in the "more" panel. Leave it on level 1, this will alow you to see it fairly smooth.
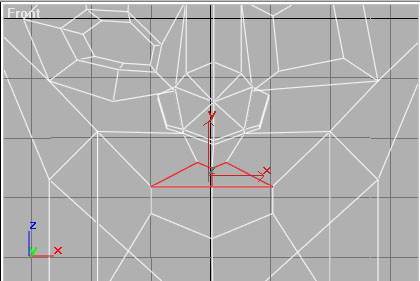
Okay now we make the nose. You don't have to start at this point on the face, but I find it to be the easiest part. As well as I base everthing else around the nose. Well anyway select the 8 front faces and extrude it 1.0.

Now use the uniform scale and scale down the nose to a point that you feel in comfortable. (Note: this will be the ball of the nose)
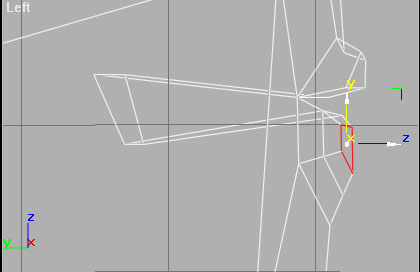
Now extrude out the still selected 8 faces that you have just scaled down. Don't worry about how far it is extruded you can fix that later.
Now go to vertex mode and start to adjust the nose accordingly. For now if you want you can adjust it to match mine.
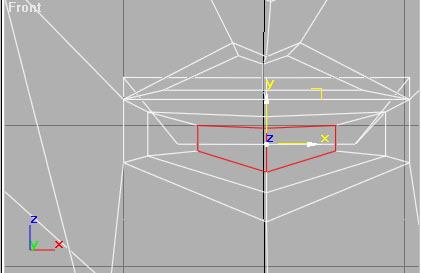
Okay now we are going to make the eyes. As you can see I have manipulated the vertecies alittle. So do that first that go back to polygonal mode and select the front 2 faces. Then from there extrude 1.0 and uniform scale them down.
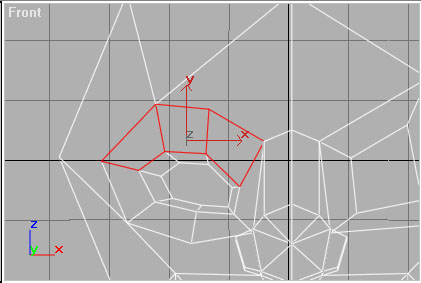
Okay now select the outer faces of the scaled face you have just created. Go to the side panel and look for a command named "cut." Select this with the faces still highlighted and from the edges drag the line from edge to edge.


Okay now adjust the vertecies to resemble more of an eye. (You can add more faces if you want by cuting more highlighted faces.)
Now scale extrude the inner face in and scale it down some. (Make sure to always check your reference to see how everything is going.)

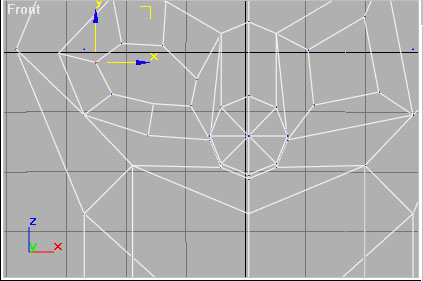
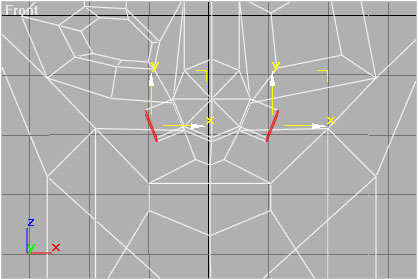
Now to form the mouth. Now if you have followed everything thus far, the bottom part of the face should look something very close to this. Now if it does continue on by selecting the 4 faces shown. From here extrude 1.0 and scale down.

If everything has gone as planned your unsmoothed face or the beta face should look like this.

Okay now for some odd reason I went to the nose without finishing the mouth. But don't worry It finish it up later in the tutorial. So just rememner to go back to the mouth. Now to make the nose we need to extrude the side faces. This will create the nostrols.

Extrude out those faces just a bit. After that scale and pull and push the vertecies to get a nose that appeals to you. Remember to look at your reference. Because the smooth face is what the final result will look like. No one but you and the dancing hola girl on top of your computer will see the rough model.
Okay now to make the inside of the nose. Select the bottom faces of the nose 1 at a time. Unlike mostly everything else.
After you select and extrude each face in 1.0 you can select both at one time and scale the together. After you scale it to were you are happy extrude the faces in. The end result should look like this.
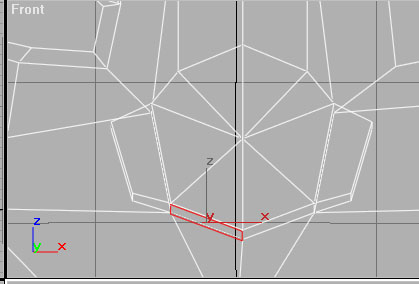
Okay now back to the mouth. Select the 2 faces that form the upper lip. After selecting the 2 faces extrude them foward a bit. Now scale it down. Here you will use both uniform and no uniform scales. So mess around with it until you are pleased. Repeat the same process for the bottom lip.
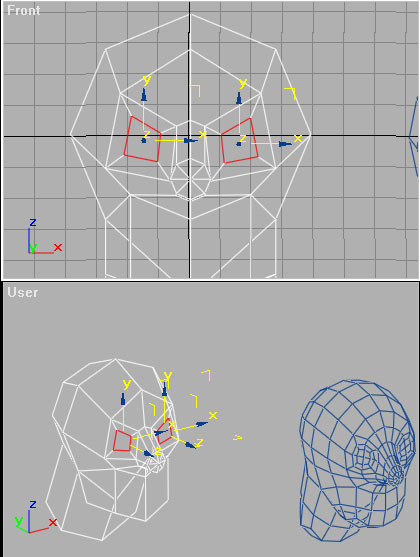
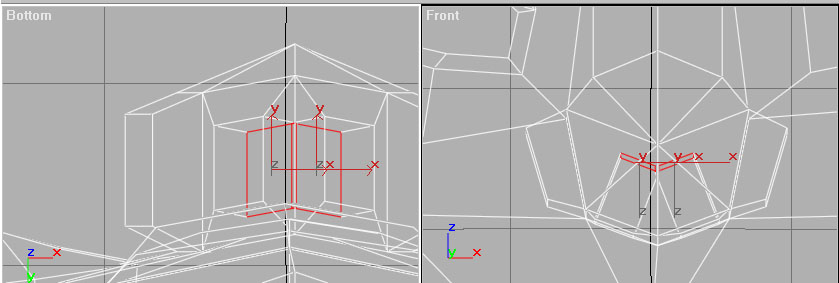
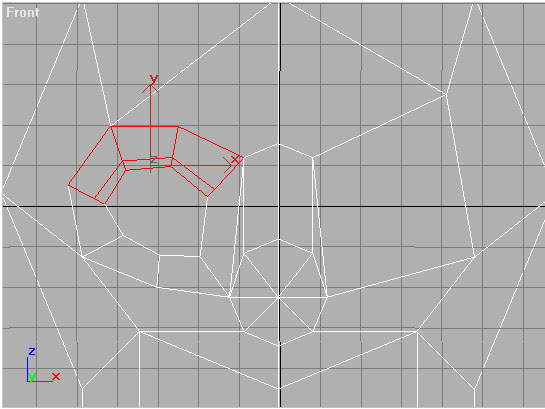
Now to create the eyelid. To create the eyelids select the faces shown. From here cut the faces to look something like this.
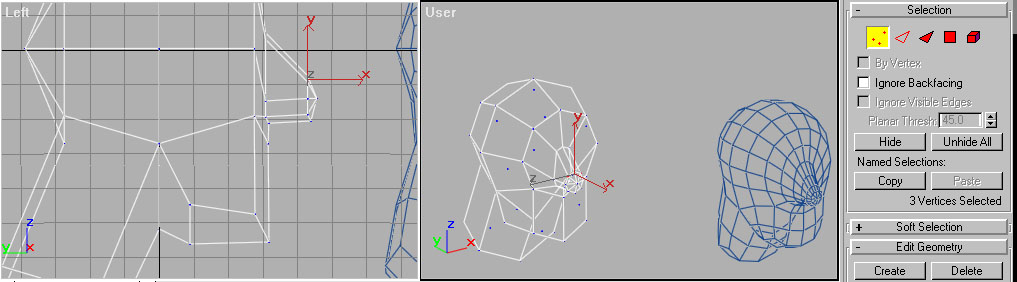
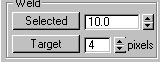
Now just incase you ran into the same problem I did you are going to have to weld some vertecies together. To make sure they work fine turn up the welding options to 10.

Now if the smoothed version of you head looks alittle funky you may need to turn some of your edges. Go to the "edges" option and from there you should see the tab "turn." Turn it on and then select the edge that looks funky. The best advice I can give here is to try and get both sides of the face to look symetrical.

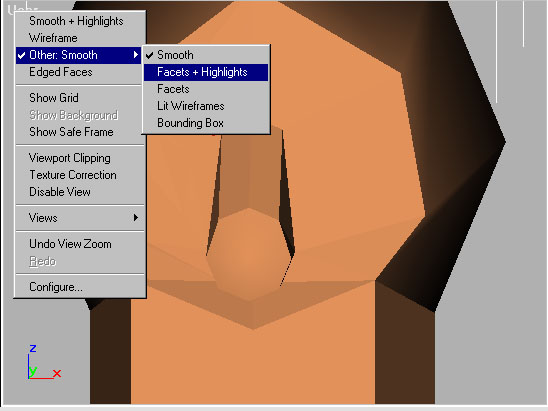
Incase it is hard to see the edges go and change the appearence to "Facets and Highlights."

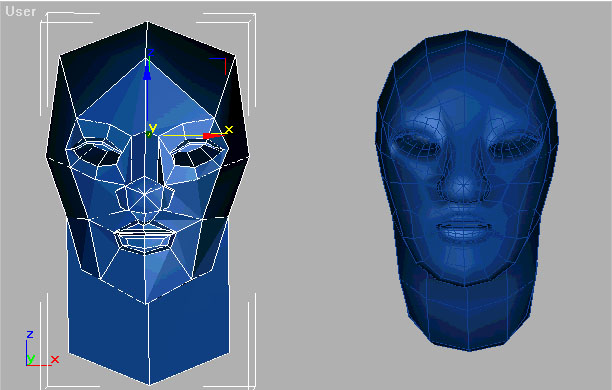
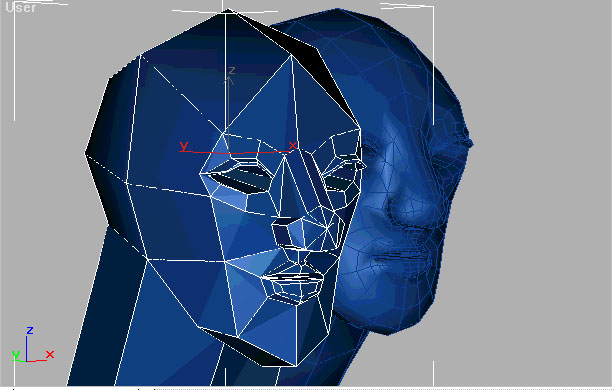
This is what the finished face should look like.

And that's about. Now to get more realistic faces you have to cut more faces and pull and push points. Just remember to look and real faces and base you designs on it. If there is anything that you need to know or feel that I have left out, feel free to email me. And if you find easier ways to do things or techniques that give better results please email me as well. I hope this was useful.
My World (http://www.theartz.net/MW/)